
Samsung Galaxy J3 (2016)


1. Find "Access Point Names"
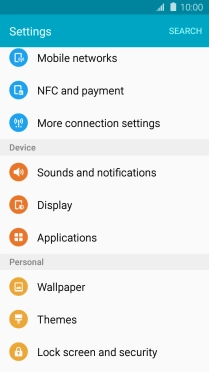
Slide your finger downwards starting from the top of the screen.


1. Find "Access Point Names"
Press the settings icon.


1. Find "Access Point Names"
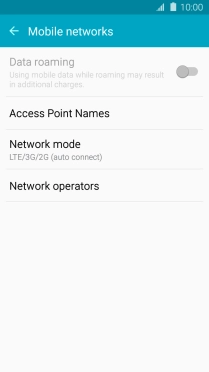
Press Mobile networks.


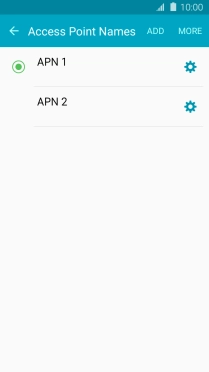
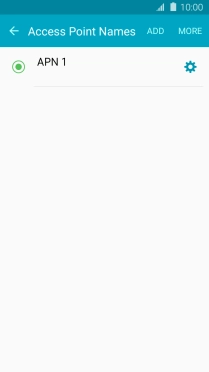
1. Find "Access Point Names"
Press Access Point Names.


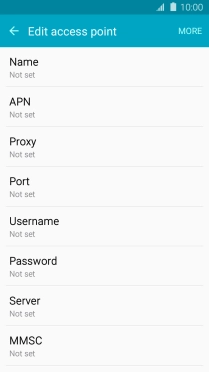
2. Create new data connection
Press ADD.


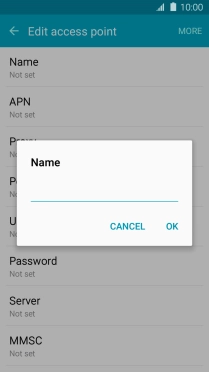
2. Create new data connection
Press Name.


2. Create new data connection
Key in Vodafone MMS and press OK.
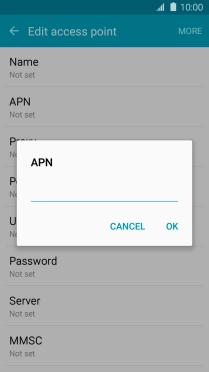
3. Enter APN
Press APN.


3. Enter APN
Key in live.vodafone.com and press OK.
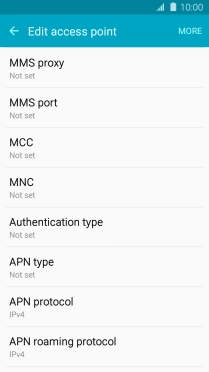
4. Enter MMSC
Press MMSC.


4. Enter MMSC
Key in http://pxt.vodafone.net.nz/pxtsend and press OK.


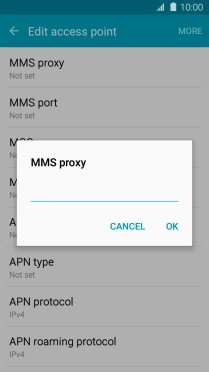
5. Enter IP address
Press MMS proxy.


5. Enter IP address
Key in 172.030.038.003 and press OK.
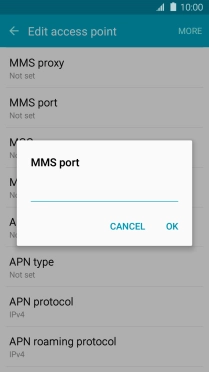
6. Enter port number
Press MMS port.


6. Enter port number
Key in 8080 and press OK.
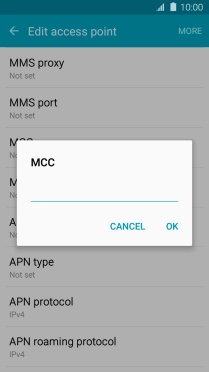
7. Enter country code
Press MCC.


7. Enter country code
Key in 530 and press OK.
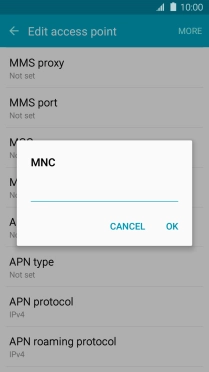
8. Enter network code
Press MNC.


8. Enter network code
Key in 01 and press OK.
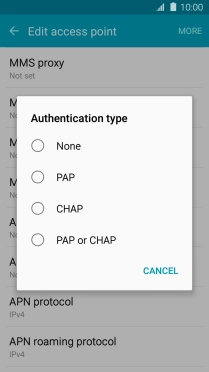
9. Select authentication type
Press Authentication type.


9. Select authentication type
Press PAP.
10. Select APN type
Press APN type.


10. Select APN type
Key in mms and press OK.
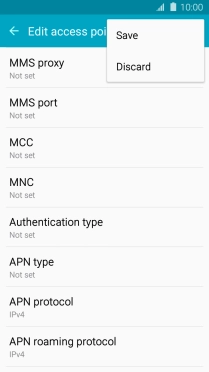
11. Save data connection
Press MORE.


11. Save data connection
Press Save.


12. Return to the home screen
Press the Home key to return to the home screen.
1. Find "Access Point Names"


2. Create new data connection
3. Enter APN
4. Enter MMSC

5. Enter IP address
6. Enter port number
7. Enter country code
8. Enter network code
9. Select authentication type
10. Select APN type

11. Save data connection
12. Return to the home screen